Monday, September 23, 2019

Assignment Due September 30th Reference photos for head drawing

Look at the structures of these heads as drawn/painted by Dean Cornwell. Observe the use of "shadow shapes" to define structure. Also look for the changing of planes from front to side of the head. 


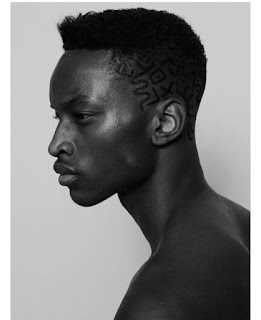
Look at the following photos and use the lighting to indicate changes from one plane to another. Don't "shade" the drawign, rather look for areas of shadow shapes and transitions. Note that more abrupt transitions get a hard darker edge mark while "softer" or more gradual transitions get a lighter and more diffused edge if any. 
Photos to follow


Drawing the Head

This week I want you to draw 10 heads in your sketchbooks. I would advise giving a page per head and focusing more on proportion, structure and basic shapes than features or rendering...( See the  drawing pages for ideas on how to produce a finish) Use shadow shapes and structures.
HEre is some reference and some images for you to look over as you draw.  The photos will be in the next post.
Look at these proportions for the head and how they translate to the below images by Andrew Loomis

Direction of head indicated as "crosshairs' on sphere gives you direction of entire facial plane


See how rendering can be done with a few lines indicating contour and shadow forms


 From loose ball construction to finished drawing

Friday, September 20, 2019

Drawing Assignment 3

Assignment #3


Read through these pages; Go back to photos from last week and do three more final drawings of the figures...build out from loose gestures to solid volumes to more complete forms with detail

Remember this:
Life drawing process

1. Gesture/ story
2. shapes
3. landmarks
4. volume
5. anatomy
6. value/rendering

Eight main parts of the body

Head
Spine
Arms(forearms, upperarms)
Legs( calves/ Thighs)
Pelvis
Ribcage


Front of torso landmarks

pit of the neck
clavicle
sternum/manubrium

ends of the thoracic arch of ribcage

belly button

bottom of pelvis


We will cover the back landmarks this week a bit. just so we can complete the torso. but look over these landmarks for ideas.


Do some skeleton gestures where you are focusing on finding the landmarks and using them for positioning.
 Look at the center line showing the connection between ribcage and pelvis start to define volume around spine.


look at these torso " box drawings to show volume and direction of the body building up from the looser gestures from above


building out from those landmarks and gestures you can see how softer forms can be built around the skeleton of the gestures




Thursday, September 12, 2019

Homework assignment #2


First: starting this week , EVERY WEEK in your sketchbook I want to see ten drawings of hands....at most one or two per page of sketchbook. They must be numbered and dated.


Second: For this week, In your sketch book I want you to take the concept we covered of the bean and apply it to the figures in the pieces.  The main goal is to analyze to form of the figure.

Step 1:Look at these drawings/photos for examples,

Step 2: Read through the pages in the book on gestures

Step 3: Draw 20 bean/gesture figures on sheets in your sketchbook from the pictuires provided at the bottom of this page.

Remember- Stay loose, focus on volumes, don't worry about rendering. 
The beans we've been doing in class. Think the upper bean is the torso, bottom bean the hips.
The direction of the beans indicate the shape and direction of the torso.
Look for places where the body "squashes" and stretches. One side will squash the other stretch

note the twist of the hips and the chest away from each other. and how you can start dividing the bean into body forms. The midsection where the abdominals and the laterals and obliques are is an area that twisats like a twoel between two solid objects( The chest and the hips)  
The abdominal area twists like a cloth above.


Read this:


Use these :